Showing posts with label Paper. Show all posts

Wednesday, December 11, 2013

Week Fifty-Two: Framed Christmas Piece FINAL WEEK!

We've done it! We're skating over the finish line, we've got the medal clutched in our fist, we're tired and need a rest. But no! There won't be rest yet, not until after Christmas, as I have quilling to do for loved ones for that day.

It has been a long and very rewarding journey. I have at least tripled my loyal viewership, I have about doubled how many views this page has had, and I have a massive, massive pile of stuff ready for my next market. It's been wonderful.

To my Pinterest followers, you are a delight and I get a huge thrill out of seeing someone pin one of my projects and they didn't pin it from me, it's been on a magical journey to find them without me. Art can move through the channels of our web community, isn't that inspiring? Makes you just want to make and share more stuff I say. Speaking of which, I will be starting a new board for my quilling and leaving the challenge board to sit with its contents as is, I've called the new Board PDPD Quilling, so come have a look and follow it to keep up the fun and inspiration! Seriously, I thought I would be out of ideas and totally over this whole quilling thing after this challenge, but I'm not, I've got ideas pouring out of my little ears and I'll be going strong long after this challenge.

You'll see I've changed my blog header and Facebook page banner to display all the quilling challenge, or at least one thing from each week.

Anyway, enough gushing and happy-ranting from me, let's get on to our last project of the quilling challenge!!This week we're ending on one last framed piece and it's Christmassy to boot.


Santa is off on his busiest night of the year, with his trusty steeds ahead. There are only five visible, but let's just agree that magical flying reindeer are probably so in tune with the reindeer they fly beside that their movements are matched, and all nine reindeer are there, with Rudolph leading them all onward.


Perhaps this is part way through the event, Santa's tummy looks like it is full of milk and cookies!


I used the husking technique for all of these, with the one reindeer drawing to create all five, but they still came out with slight differences and I like that, Rudolph obviously having one very intentional difference.


This is a lovely way to depict the magic and wonder of Christmas.


I'll be back soon, some time in the next couple of weeks to show you the stuff I've made for loved ones for Christmas and get some pins in that new board on Pinterest.

Until then, Merry Christmas to all, and to the Quilling Challenge year, a goodnight.

xnata

Monday, December 2, 2013

Week Fifty-One: Christmas Window Wreath

This week's project is appropriately Christmassy, seeing as it is now December!


I wouldn't put it on the front door or outside as it could get wet, but it makes for a lovely wall or window decoration.


I went for a peach and cream colour scheme, using scrapbooking paper to make it firmer than regular quilling paper.


It was a beautiful two sided paper with pink, green, blue and yellow butterflies on one side and peach and cream stripes on the other.


I did the same treatment to this as I usually do to my snowflakes such as those mentioned at the end of this post and last week's pegs, with my favourite glitter glue and a spray with Crystal Clear.


I added a ring of the paper at the back to slip the ribbon through, I didn't want it through the front at all as I think it would have looked messy. This works with my 'kid safe' set of ornaments for our tree, which are shades of peach, cream, white and aqua. My toddler can't be trusted around my old glass ornaments. I look forward to the day I can use them again, but at least I have a soft and pretty alternative.

 
 I have hung it in a front window of our home. Next week is the final week of my year long Challenge!! I can't believe it, and I have heaps of things left on my list to create, so not to worry, it won't be the end of my blogging I promise.
 
 
xnata

Monday, September 30, 2013

Week Forty-Five: Lavender

After this week there are only seven projects until the end of my 52 weeks challenge! I can't believe I it, I hadn't noticed that until today. It's gone so quickly, and I certainly have more than seven projects left on my list of ideas, so don't worry, I'll still be quilling and posting after the challenge is complete, just maybe not as often.

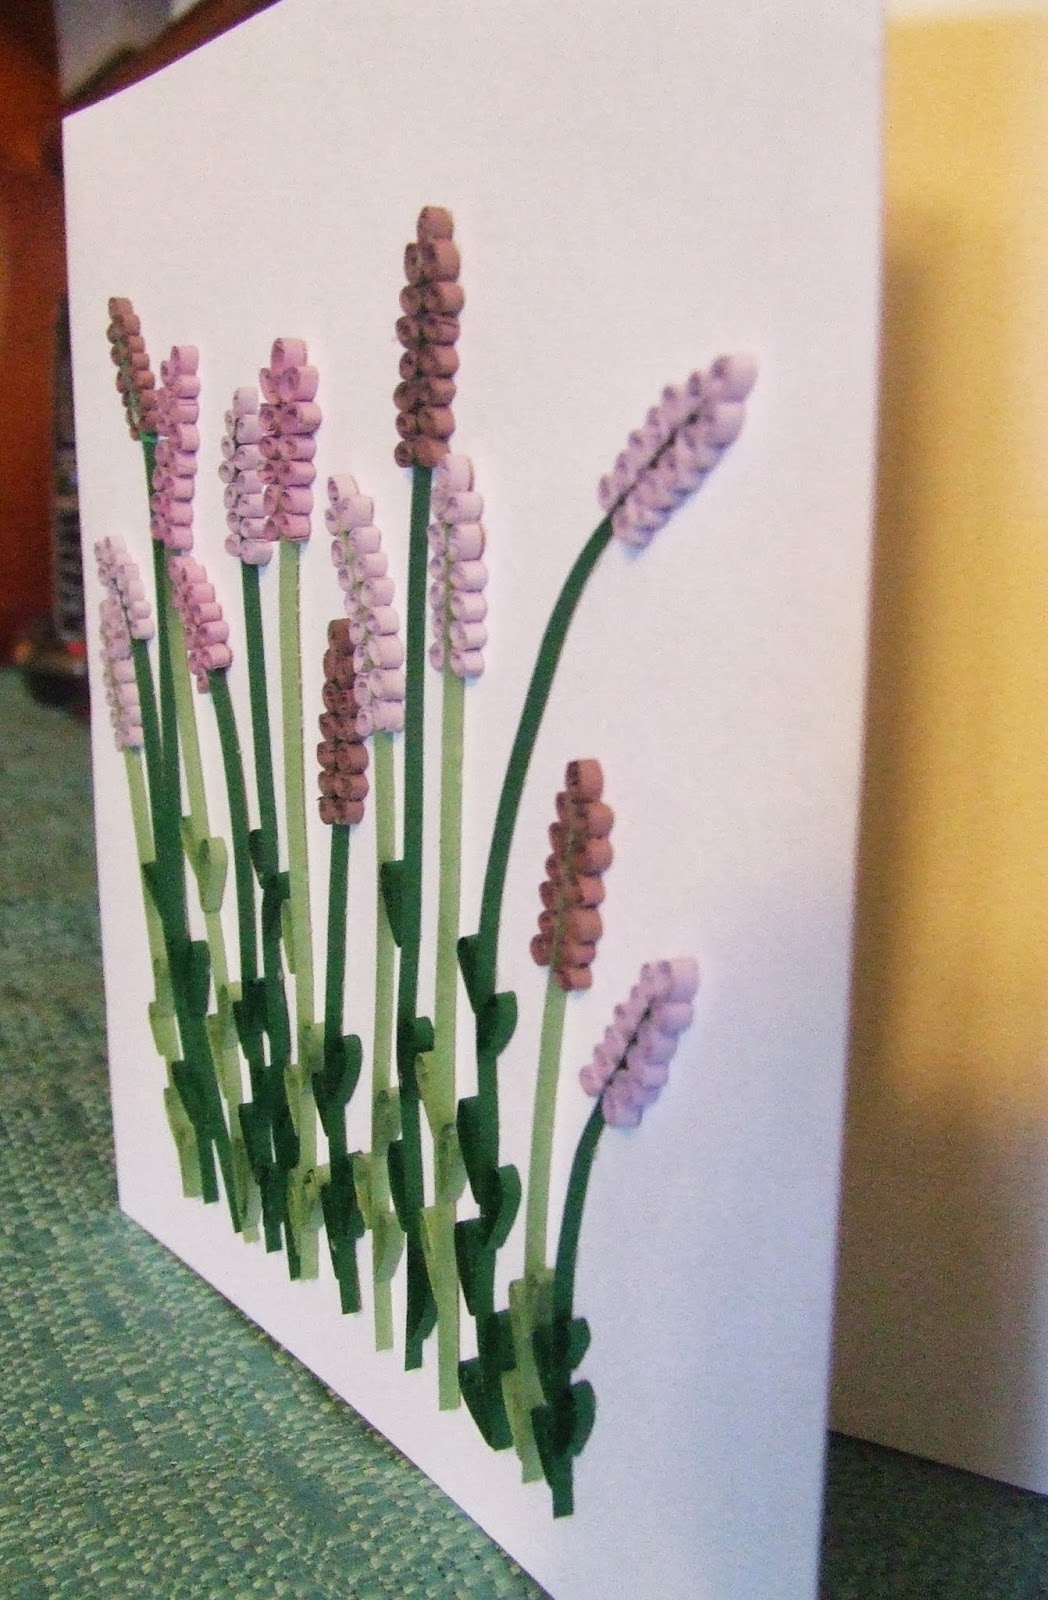
This week we've got some lovely lavender cards.


On the bigger one they're growing wild...


...and on the smaller one we've got a bunch of them on a nice metallic purple background.


These are lovely and simple, yet all those little purple dots end up taking a lot of time! I didn't expect they'd be all that time consuming.


They're very softly feminine. I loved the different shades of purple I used in this card, the purple section of my paper supplier's range is one of my favourites (the blue range is the best though - and I seem to be constantly needing more green!)


Next week we've got another 3D quilling project inspired by a furry friend I made a few weeks ago...

Remember that even if I am nearly done with my year of quilling challenge I am happy to hear any suggestions you have of other quilling project ideas you'd like to see me tackle. I am also happy to do some more 'how to' posts with step by step photos by request, I might do a how to on another 3D project I have planned for around Christmas time.

xnata

Sunday, September 22, 2013

Week Forty-Four: Dragon

I'm finally fitting in another request subject this week, and it's one that two people actually suggested. Let's see if I have met people's expectations shall we?


He's red and scary, at least for a dragon that hasn't got his fangs out. And he's got a bit of a belly on him. But you're intimidated, right? Even the cute dragons can breathe fire.


Here he is before he became all colourful. I went with red as it's the colour I immediately imagine when I think of dragons. I suppose he'd look equally lovely in green or blue.


I know he's not in line with my usual style, but I like to be diverse in my creativity and I'm quite pleased with the result. Especially his wings.


Next week we'll go back to my usual super-girliness with a type of flower I haven't quilled before (hard to believe there are many types of flower left, but there you have it! And I won't stop until I've done them all).


xnata.

Monday, July 15, 2013

Week Thirty-Five: Butterfly Nursery Mobile

This week I have attempted something a bit different, and I gave a clue a week or two ago on the Facebook page, and I must say I'm quite chuffed with the end product, it is gloriously sweet.


A Rainbow of pretty husked flutterbies for little babies to watch as they fall asleep!


The fantastic thing about these husked butterflies for this purpose is that they are so light and seem to catch the teeniest tiniest breeze, so it's basically constantly moving, which is perfect for the little bubby watching, it's quite mesmerising and so happy and bright.


I've used the classic husking technique as displayed in Week 7, in various sizes and all the basic colours of the rainbow.


The frame is made of the inside ring of embroidery hoops of two sizes, and I've painted them with a pearlescent white paint, then it's all put together with white embroidery thread, nice and thick to hold up the rings but one strand thick for the pretty butterflies. I've sealed the knots with fabric glue to avoid it unravelling, and I've sprayed the butterflies with 'preserve it' to avoid colour fading and make them a little tougher. And it's all held up by a simple silver ring.

I've seen ways to make the structure to attach it to a crib, but as it's so delicate I would suggest hanging it from a hook in the ceiling would be much better, and you can add string to the ring to have it lower down without it ending up within reach of your little munchkin/s as even a baby would crush these within seconds.

Here's a shot of what the little ones will see...

It was hard to pick a photo of this nursery mobile, as the breeze changed it so often that each picture was different in a lovely way. Getting this to hang evenly was the hardest part of this project I must say, it took a few tries and lots of wasted thread, but now I've got the hang of it I am sure I won't have so much trouble in the future.


So, that was lovely wasn't it? Makes you wish there were more real live butterflies around. We should do something about that. Having said that I found one in my kitchen last week, perhaps she saw these others and knew we were butterfly-friendly. Anyway, next week we're going to see something really purple!


xnata

Sunday, June 16, 2013

Week Thirty-One: Love

My husband and I have been married for 5 years as of this coming Friday! We've made a pretty good team so far, he's my best friend, and the most awesome little boy, so I would say it's been a very successful 5 years.

Did you know that the traditional gift thing for 5 years is wood? We didn't really need anything made of wood, so we are just going to go on a date one night instead. But my craft involves paper, and paper comes from wood, and this week's project is to celebrate our anniversary, so that counts right?

I saw this design in teeny-tiny calligraphy form in my calligraphy book a while back, and instantly wanted  to quill it, but nice and big.


I got clever for a moment and drew it in the size I wanted, then quilled the shapes using the husking technique (for those not aware of what the husking technique is, check out my week seven butterfly post). For this it was a good way to get the shapes just right for the lettering, though the transfer process was a bit tricky as they all link together and didn't retain their shape so well once I took the pins away.


Careful gluing to the card was required to get them sitting just right, but it turned out just right. I briefly toyed with the idea of adding swirly bits and fill to the letters, but the thought was very brief indeed because I just love the simple look to this, and I think them being swirly bit free keeps the focus on the heart and just really makes the card pop.


This is a fun mod card and I'd happily make more despite the complexity. Now I can't wait to get this giveaway going, I've been working on one of the choices (yes, the winner gets to pick their prize!) and it's so special and exciting I'm going to give you a sneak peek at it on my Facebook page, so keep an eye out for that pickie and then next week we'll get the 100th Blog post celebration and giveaway underway!

If you're in Brisbane Australia remember to come see me at the All Saint's Winter Markets, 501 Hamilton Road Chermside this Saturday (the 22nd) from 7am to 12pm.

xnata

Wednesday, June 12, 2013

Week Thirty: Dolly Decor

Are you ready for some tiny and adorable things?

These could be great as a gift to a little girl (or boy, some boys like it too) who likes to play house with Barbies or one of those Sylvanian families or something. Though you'd have to make sure to tell her (or him) to be gentle and never let them get wet. Or maybe someone would like these for their miniatures collection, and put it in a cabinet with all their other tiny pretties.


We've got two tea sets and some flowering pot plants! With my quilling tool in the background to give you an idea of their tininess. Adorable right?


The pink one is tea for two, with two little cupcakes on a plate.


The purple one is a big tea set for six little people to have tea together.


Then we've got a pot of sunflowers...


...a potted rose bush...


...and gerberas in a little purple pot.


All very sweet don't you think? The flowers would look nice in a doll house, or maybe outside in the doll's garden. I'm surprised with how well the gerberas look. The leaves in this shot are still drying, I coated them in glue to make sure they don't become misshapen. I actually had to look up what they look like, I couldn't remember the leaf shape!

Next week we get all lovey-dovey because my 5th wedding anniversary is coming up!

xnata

Tuesday, May 14, 2013

Week Twenty-Six: Baby Fever!

We're half way through my year long challenge! Holy wow that's gone fast!


This month I've caught baby fever, because I'm the mother of an almost two year old and it's making me terribly nostalgic and clucky. I can't believe I'll never get to cuddle the baby version of my boy again! On a positive note, he is a fantastic kid, fairly obedient as far as toddlers go, clever, cheeky and hilarious.


I'm not alone in my baby fever though, I have several pregnant friends, and friends with babies, and my baby cards are always bought on their first trip to a market, so I guess the fever is everywhere!


I wanted to make some baby boy and baby girl typography cards, and then that led to me making a bunch of baby themed gift tag cards too!


I added a bow, a flower and a love heart to the super pink it's a girl card...


I really like the addition of the bow to the I.


And a hat, a cricket bat and bouncing ball to the lovely blue it's a boy card.


The hat on the O has the same magic as the girl's bow.


For the little gift tag cards I added squares of scrapbooking paper in the classic colours, then added the words, punched a hole, added the string, and quilled some little tiny feet...


These would be nice to add to a bag of goodies to give to a new mummy when you get your first cuddles, or at a baby shower. I like small cards like this for my own gift giving purposes, because it keeps your message inside short and sweet. Big cards make me feel obligated to write a big long message, which probably leads to rambling.

I want to make sure I have heaps of baby cards available for my next market, because they're such good sellers and I hate to disappoint my customers when I run out. This lot has me off to a good start!


The text I've used on these are rub-on stickers, and I love them, they are perfect for the look I want for my cards, and I've just discovered today that the 'it's a boy' and it's a girl' of these have been discontinued :( so I hunted around online and found some at one shop and bought five packs of each in two different colours, so I've got 100 of each which arrived in the post today, and for only 30 cents per packet  :) hopefully by the time I run out I'll have found a new design that I like.


Next week baby fever continues, with more of a focus on my soon to be two year old.

xnata.