Showing posts with label framed quilling piece. Show all posts

Wednesday, December 11, 2013

Week Fifty-Two: Framed Christmas Piece FINAL WEEK!

We've done it! We're skating over the finish line, we've got the medal clutched in our fist, we're tired and need a rest. But no! There won't be rest yet, not until after Christmas, as I have quilling to do for loved ones for that day.

It has been a long and very rewarding journey. I have at least tripled my loyal viewership, I have about doubled how many views this page has had, and I have a massive, massive pile of stuff ready for my next market. It's been wonderful.

To my Pinterest followers, you are a delight and I get a huge thrill out of seeing someone pin one of my projects and they didn't pin it from me, it's been on a magical journey to find them without me. Art can move through the channels of our web community, isn't that inspiring? Makes you just want to make and share more stuff I say. Speaking of which, I will be starting a new board for my quilling and leaving the challenge board to sit with its contents as is, I've called the new Board PDPD Quilling, so come have a look and follow it to keep up the fun and inspiration! Seriously, I thought I would be out of ideas and totally over this whole quilling thing after this challenge, but I'm not, I've got ideas pouring out of my little ears and I'll be going strong long after this challenge.

You'll see I've changed my blog header and Facebook page banner to display all the quilling challenge, or at least one thing from each week.

Anyway, enough gushing and happy-ranting from me, let's get on to our last project of the quilling challenge!!This week we're ending on one last framed piece and it's Christmassy to boot.


Santa is off on his busiest night of the year, with his trusty steeds ahead. There are only five visible, but let's just agree that magical flying reindeer are probably so in tune with the reindeer they fly beside that their movements are matched, and all nine reindeer are there, with Rudolph leading them all onward.


Perhaps this is part way through the event, Santa's tummy looks like it is full of milk and cookies!


I used the husking technique for all of these, with the one reindeer drawing to create all five, but they still came out with slight differences and I like that, Rudolph obviously having one very intentional difference.


This is a lovely way to depict the magic and wonder of Christmas.


I'll be back soon, some time in the next couple of weeks to show you the stuff I've made for loved ones for Christmas and get some pins in that new board on Pinterest.

Until then, Merry Christmas to all, and to the Quilling Challenge year, a goodnight.

xnata

Sunday, September 15, 2013

Week Forty-Three: Kite

This week's project is simple and hopefully inspiring, while also being bright and cheery.


It's a nice little message that I hope inspires people to be courageous.


The clouds were created with loose swirls layered over the top of each other.


I went with bright and cheery colours for a simply designed kite with a nice long tail and a silver thread tethered somewhere far below.


Next week I've got something else that soars through the air...
 
 
xnata.

Sunday, August 25, 2013

Week Forty: Puddle-Wonderful

Only one day late, I'm catching up!

This week's post is inspired by the quote included, using words from a poem called 'Just In' by E.E. Cummings, and frequently paraphrased thusly: "The world is mud-luscious and puddle-wonderful".


We have a little kid under a big umbrella, walking through the rain and enjoying the puddles.


This technique for water was a bit of a practice for me, for a big special piece involving water that I will be working on as soon as I've ordered a lot more of these shades of blue...


It's a good reminder to try and see things from a positive perspective as much as you can, and enjoy the little pleasures in life.


Okay, so that's cute, and it was good fun to make. This week's project will be up as soon as I can fit it in to my annoyingly full schedule.

xnata.

Tuesday, August 6, 2013

Week Thirty-Eight: Ferris Wheel

Those of you from Brisbane will already know why I've chosen to create a Ferris Wheel this week, but for those reading from afar, this week will see the start of the Brisbane Exhibition, otherwise known as the Ekka.


The quote came first, and the ferris wheel popped into my head as I read it, and I just had to make it right away. It's actually been made for about a month, but I wanted to save it for the Ekka theme, but it's been hard keeping it a secret!


It won't fit behind glass unfortunately, but personally I think that would reduce the impact of the piece. I love this sooo much, both image and sentiment, I think I might keep the original, but I'm sure I'll make more to sell!


I used plain/metallic scrapbooking paper for the structure of the Ferris wheel and the carriages, then silver quilling paper for the actual wheel, and more quilling paper to edge the carriages and the love heart at the centre of the Wheel.


I wanted the quote to be small and in a simple sort of font, so as to not compete for the initial impact of the quilling.


I went for softer, pastel colours in a bit of a rainbow colour scheme, though I think one with shades of red and pink would also work.


Next week we're going to take a walk in the rain...

Have fun!

xnata.

Monday, July 29, 2013

Week Thirty-Seven: Quilled Initials

Last week I made something in the popular Pinterest trend known as ombre, and this week I've made something in another pinterest trend's style: chevron!


Many people like to have their child's name or initial done up in an artistic piece for their bedroom wall, or maybe the family's surname initial to add to a beautiful wall of family photos.


I love this faux-vintage frame.


I went for a minty-aqua colour for this piece, I think with the white it's a very fresh sort of look.

 
Next week's piece is already done, and I've decided it's my favourite so far! I read the quote somewhere and the image came to me right away, and I just had to make it while it was fresh in my mind! So excited for you to see it, but I'll hold off for next week when it's actually due.

xnata

Tuesday, July 9, 2013

Week Thirty-Four: Blowin' Bubbles

This week we are getting into my framed pieces, there will be several of those in the next few weeks (apart from next week, which will be a whole other story) we get a reminder to enjoy the simple things in our lives. It keeps you young.

 *Before we continue, I have announced the winner of the mask or frame competition, the winner's name is up on the Facebook page - the winner chose the frame, so the mask is now available for purchase! I'll be mounting it to a stick, and it will be $18 + postage*


This design is fairly simple in terms of the quilling, bubbles don't take much to look good, but what is great about them is the impact of lots and lots of them! I've got them gradually increasing in size on this one.


I think he looks a little like Christopher Robin, don't you? I think it's that scruffy head of hair.


H. Jackson Brown has some fantastic quotes, I'll be doing others with his wisdom involved, all taken from a book I own that he wrote called 'Life's little instruction book'. It was written for his son, so I think it's quite fitting that we've got a boy involved in this piece.


The bubbles are in all the colours you might see in the surface of a real bubble.


We've got lots more framed pieces coming up in the next couple of months, all to end up for sale along with masks and other items on my madeit page (currently under construction, will put up a link when it's up and going again).


Next week though we're not doing something framed or a mask or a card! It's something very special and beautiful, for which I've left a photo clue on the Facebook page...

xnata

Tuesday, July 2, 2013

Week Thirty-Three: Bridal Gowns

Dum-dum-da-dum, Dum-dum-da-dum...

This week I've made some bridal gown cards for weddings or bridal showers, they're easy to make and can look really special and sweet for the couple or bride-to-be. I sometimes add a rub-on 'congratulations' to them, but this time I've left them word free so the buyers can say whatever they want.

We've got this big swirly wirly pearly gown....


....This feathery fluffy gown with 'something blue'...


...and a slinky mermaid type one with little capped sleeves, for those brides with nice curves that they want to show off...

I've given these to bride friends of mine in the past and they've mentioned that they've kept them as one of their keepsakes. Handmade cards are more special and worthy of being kept whether you're the one who made them or not though. The receiver gets to know they have this one of a kind card amongst their treasures, it's just nicer, okay?

 
The swirly one was done by forming the bodice, then a skeleton of the skirt which I filled in with lots of swirly bits and pieces. It's very big and princessy, and I added some pearl detail to the slim waist line of the gown.


The feathered skirt gown is mimicking those ruffled tulle type gowns, but in a feathery way that I just love. We've got a ribbon around the waist and some scrapbook paper to be the 'something blue', and I love how soft and feminine this one is. This was a bit more free-form than the other two, I just created the love heart bodice and then made lots and lots of the feathery shape and built it up and up until it was at a shape I felt happy with. Delightful.


Then the mermaid dress  was done similarly to the first one, with an outline being created and then filled in with teardrop shaped pieces which are a really easy shape to use for filling a space. It's so slinky and reminds me just a little of my own wedding gown, though mine was unfortunately sleeveless (it was so hard to find any with sleeves, and when I did they were for plus sized brides so I was left with no choice but to have a faux-fur made for my shoulders - you'd think these wedding gown makers would want to encourage winter weddings! Mind you on the day I had no sense of being cold because I was so excited and nervous). It's got a sweet bow at the waist, very romantic.


I'm working on next week's project at the moment, we're getting into this framed piece collection for the next few weeks, and this one is shaping up very nicely. Now please, remember that our give away is still going on on the Facebook page, so head over and comment to win the mask or the framed piece from last week! I'll be drawing that competition a week from today so get your entries in, I've pinned the competition photo to the top of my page.


xnata

Tuesday, June 25, 2013

Week Thirty-Two: 100th Blog Post GIVEAWAY!!!

We're here, it's time to start that competition!

If you were watching my Facebook page you might be very eager to see more of the two prizes, as I put up cheeky sneak peaks on there of the two options. Now lets have a good look at them!


OPTION A: Our first option is the first ever of a new quilling venture I'm taking on, there will be more in many colours and designs, but this is your chance at the very first, in a colour scheme I like to call 'Cinderella', as it reminds me of Hillary Duff's lace mask in a Cinderella Story.


The key to making these masks is PATIENCE. Oh, and a cheap plastic mask from a craft shop to use as a mould.


I started at the centre, and did little bits at a time, waiting for sections to dry before adding more. This is essential, you could really end up with a quill-tastrophy if you tried to do it all at once!


Once it was all done I turned it over and gave it a really good coat of pva to really set that shape, at first lying it in the mask to dry for a bit, then once it was semi- hardened I put it back the right way. Next, Glitter glue! Finally, a coat of sealant spray to protect it a bit better from weather, make up and other hazards it might encounter (still, do NOT get it wet future owner! And if you are going to wear it with make up, make sure you use a make up setting spray to reduce the likelihood of staining the inside of the mask.)


I haven't added a stick or ribbon yet as if the winner has chosen this I want them to pick, but I think pre-made ones will be all on sticks and custom orders will get the choice. I really must get my online shop open again...


OPTION B:


For those not interested in owning the mask, and perhaps looking for something pretty to place on a wall or bookshelf, perhaps in a nursery....


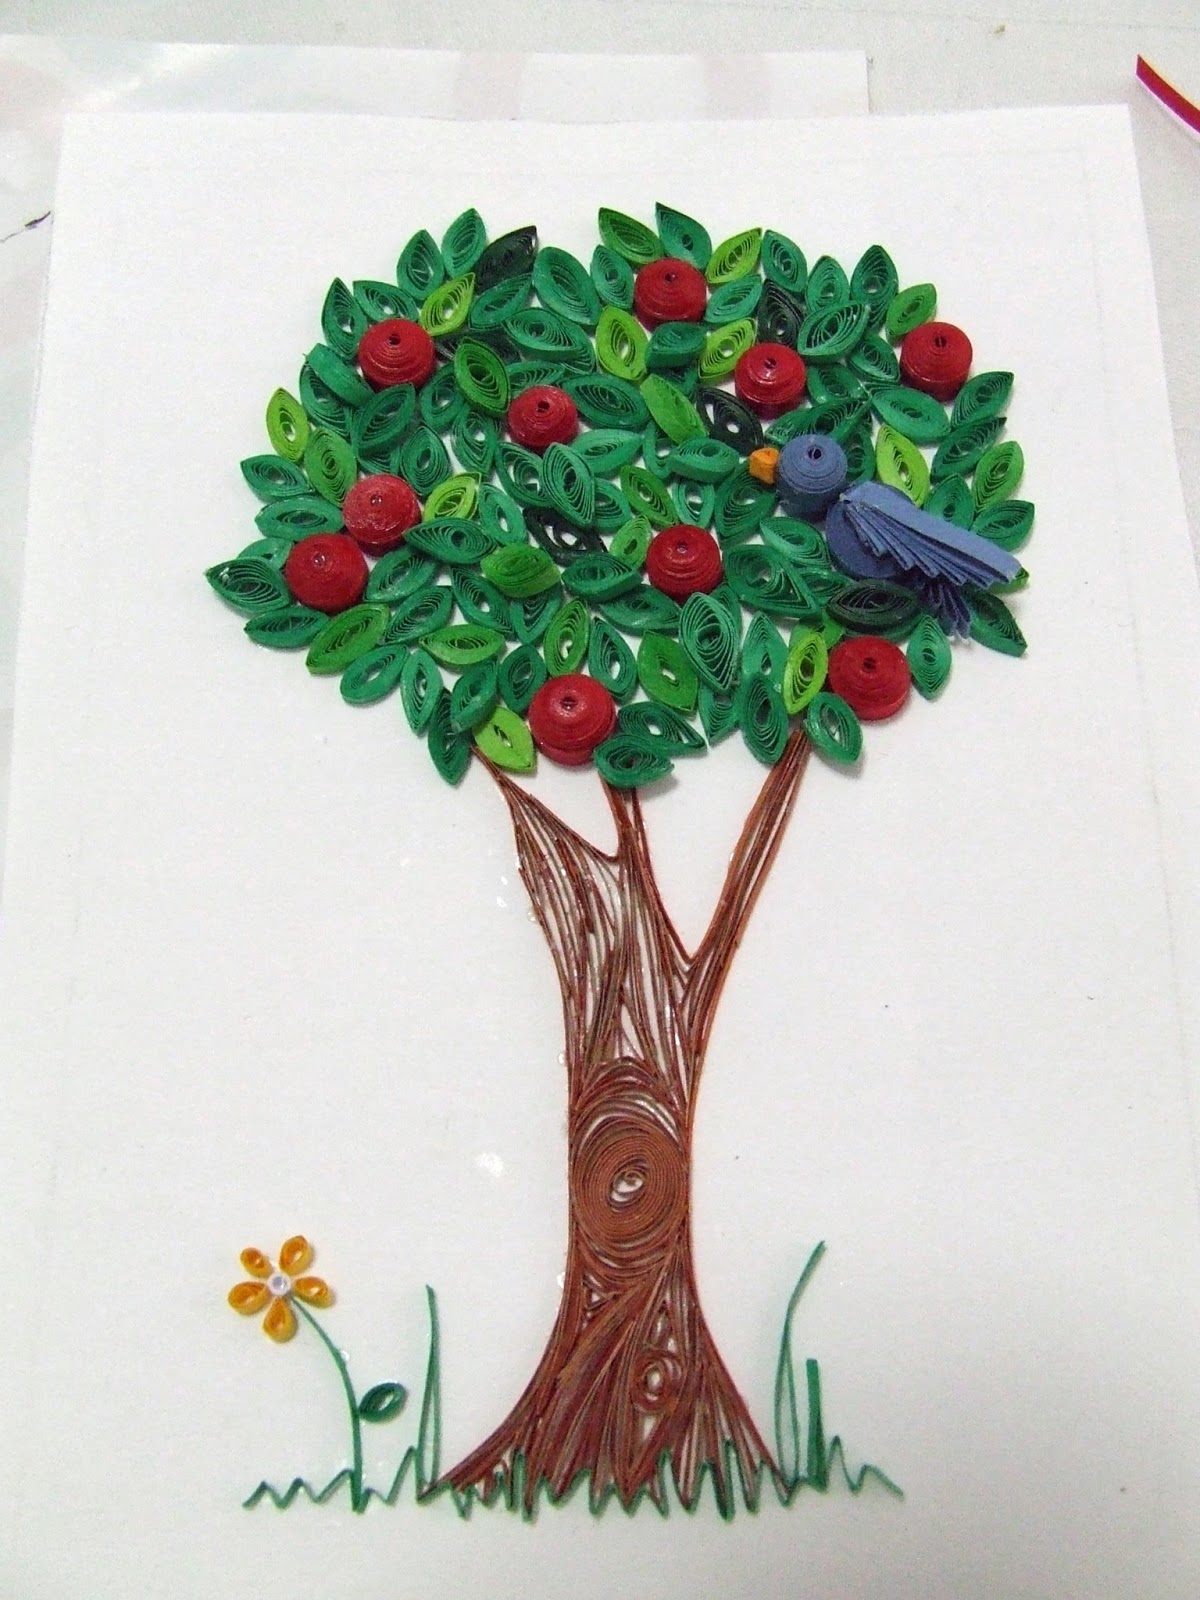
This sweet little apple tree houses a little blue bird, with a cheery little yellow flower at the base. This would be great in a baby's room, for either gender as it's a nice gender-neutral colour scheme. The frame is white, so it would suit pretty much any home décor.

 
Such a cheery image. I made the tree trunk much more detailed than I usually do with my trees, using two shades of brown and lots of lines and swirly bits.


I particularly like the idea of this being given to a Mummy-to-be for the nursery. It's such a brightly coloured piece without being over the top or loud.


HOW TO ENTER:

1: Head over to the Facebook page (link above) and find the 'comment to win' photo of these two lovelies.
2: Comment with either the word 'mask' or the word 'frame' (yes, you have to pick just one)
3: if you want to double your entry, SHARE the photo on your timeline

You've got thirteen days to get those entries in, and then two weeks from now I'll announce the winner! I'll privately contact the winner to arrange delivery and necessary adjustments.


So that's the competition info all sorted and explained, sorry if I spelled it out a bit but I don't want anyone to be confused. Let's just look now at what has been achieved so far in these 100 blog posts...


100th Post Stats

Total Blog views so far- 12, 270

Most Popular Post- Week Seven: Butterfly Husking Technique with 807 views!!!

~ which has been sold - Oh shucks I better make another... It is also the most pinned (see photo below) ~


Facebook followers: 126
Blogger followers: 35
Pinterest Followers: 90


My Favourite Quilling Project so far- Week 29: Imagine...Create!

~Which has now been sold, and its new owner is donating it to decorate the walls of respite home Coolibah House, where I hope it will do the job of inspiring its patrons to make their own wonderful art! Couldn't think of a more perfect place for something special like that to go. I can make more of this one too as I drew an extra of the silhouette and I have all the fonts (the quilling wouldn't be identical though - I'm not a machine!), so if anyone wants to place a custom order with that look it can and will be done.~


Let's see if we can make the next hundred have even better stats!


Next week we'll be turning to the subject of romance once again, and watching as the entries for the competition continue to fly in.

Thank you all, dear readers.

xnata 

Tuesday, June 4, 2013

Week Twenty-Nine: Imagine...Create!

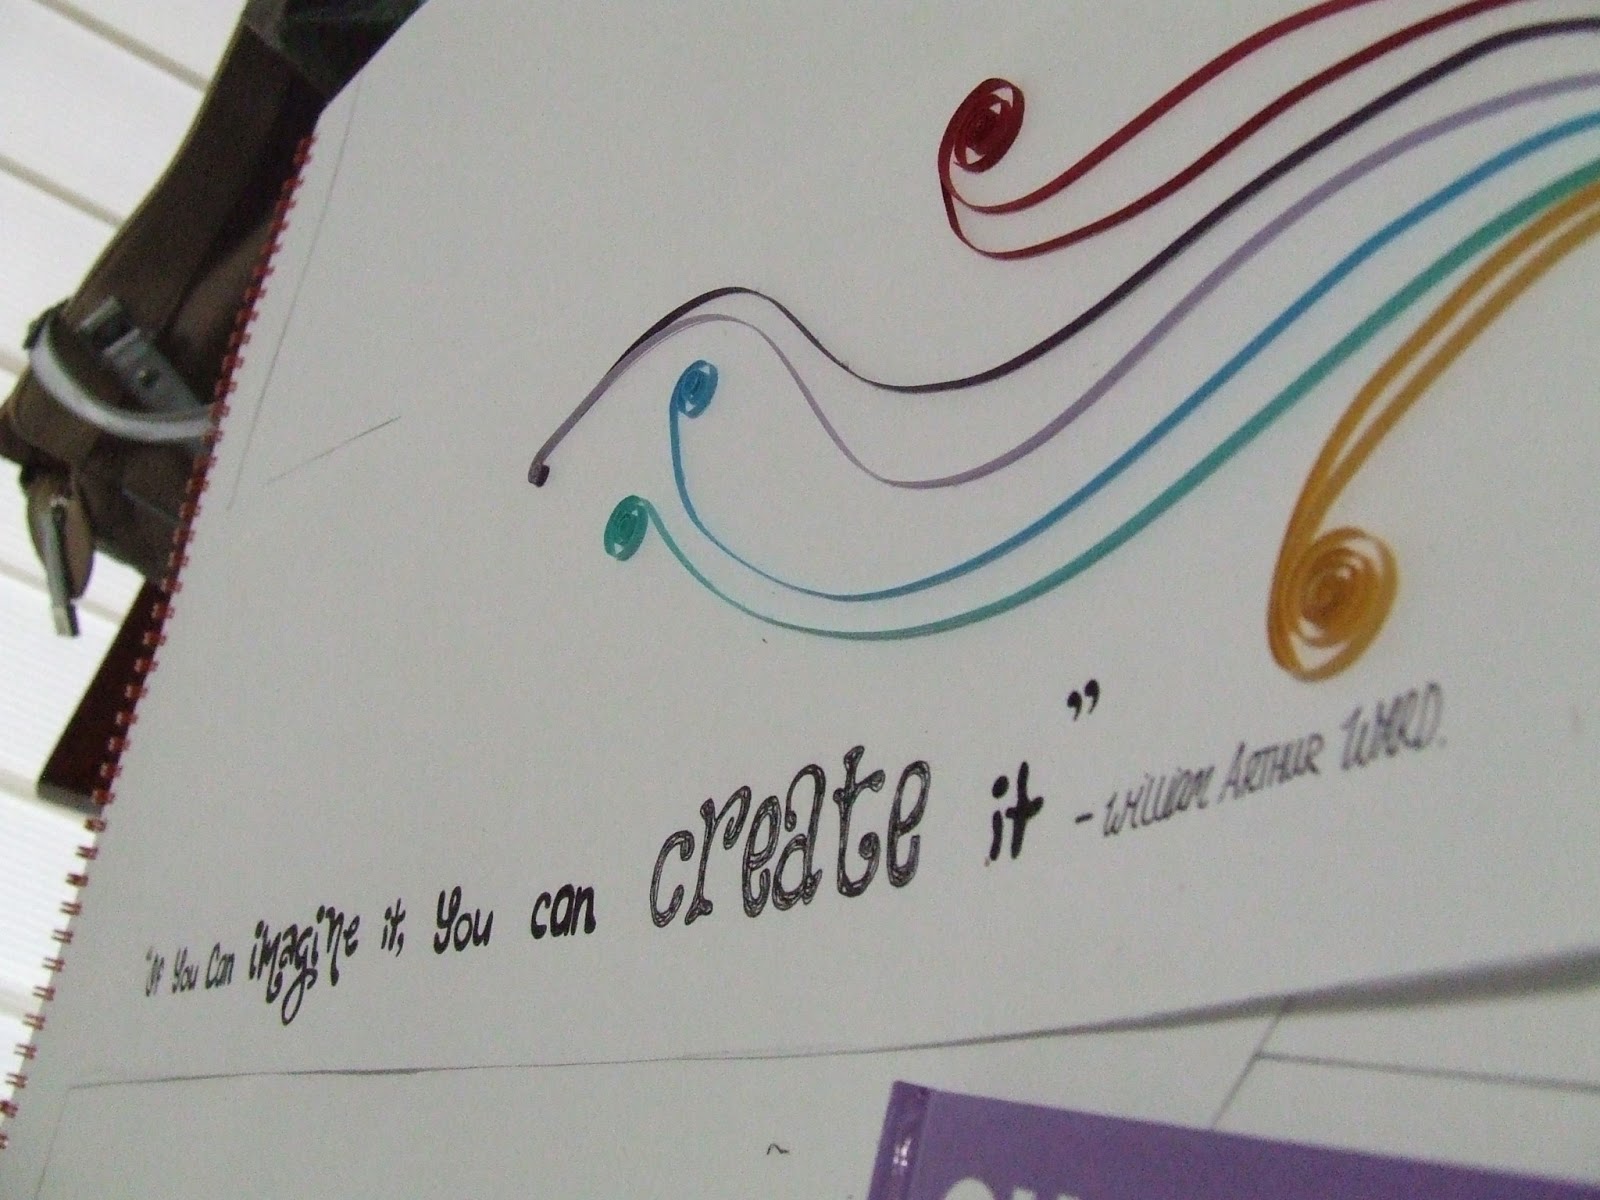
 I've done something a bit different this week, it's a framed piece that involves an inspiring quote...


The quote is one I've seen many times, though from what I understand it's actually paraphrasing what William Arthur Ward said, because he was quoted saying 'achieve' rather than 'create'. I particularly wanted it to say create, so I've gone with the paraphrased version, but I've still listed his name as the credit for the quote.


The silhouette is drawn by me, as are the words, so it's a bit of a mixed media piece. I decided to give her flowing curly hair and a bit of a wintery outfit as I didn't like her to look scantily clad and I wanted a sense of movement in her and the hair and stance got that working. I threw in the not coloured in headphones on a whim and I really like it.


The idea is that she's walking along and just trailing this amazingly colourful creation behind her, letting it out of her hand. I liked that because it's like she imagined it, planned it, and then let it out into the world on this confident stroll while she listened to music.


Here are some shots of it as it was being created...


I've already got ideas for a few others like this, one involving a little girl, the other involving a dancer...I'll see what people think of this one first, but I'm pretty sure I'll make the other ones whether this one catches people's eyes or not. It's my art and I imagine it I can create it ;)


I really like the idea of this being bought by a crafty person or artist who finds it inspirational. There's nothing I love more about quilling than the thought of it inspiring someone else to make more beautiful things. That's why I loved my quilling teaching gig, and I think one of my students was keen enough that she'll have taken it up as her new hobby, which is amazingly excellent and just what I was hoping to achieve.


I think it looks better when it isn't behind glass, but I wouldn't want to have it gathering dust for its owner (whoever that may be) so I thought it needed glass to protect it and keep it easy to dust.

So there you have it, and I might make more like this but different designs in a couple of weeks. I've got less than two weeks of the uni semester to go, so I'll knuckle down through that and then get into this theme again.

Next week we're going for a 3D project again!

nata