Showing posts with label quilled card. Show all posts

Wednesday, November 20, 2013

Week Forty-Nine: Rose Pattern Card

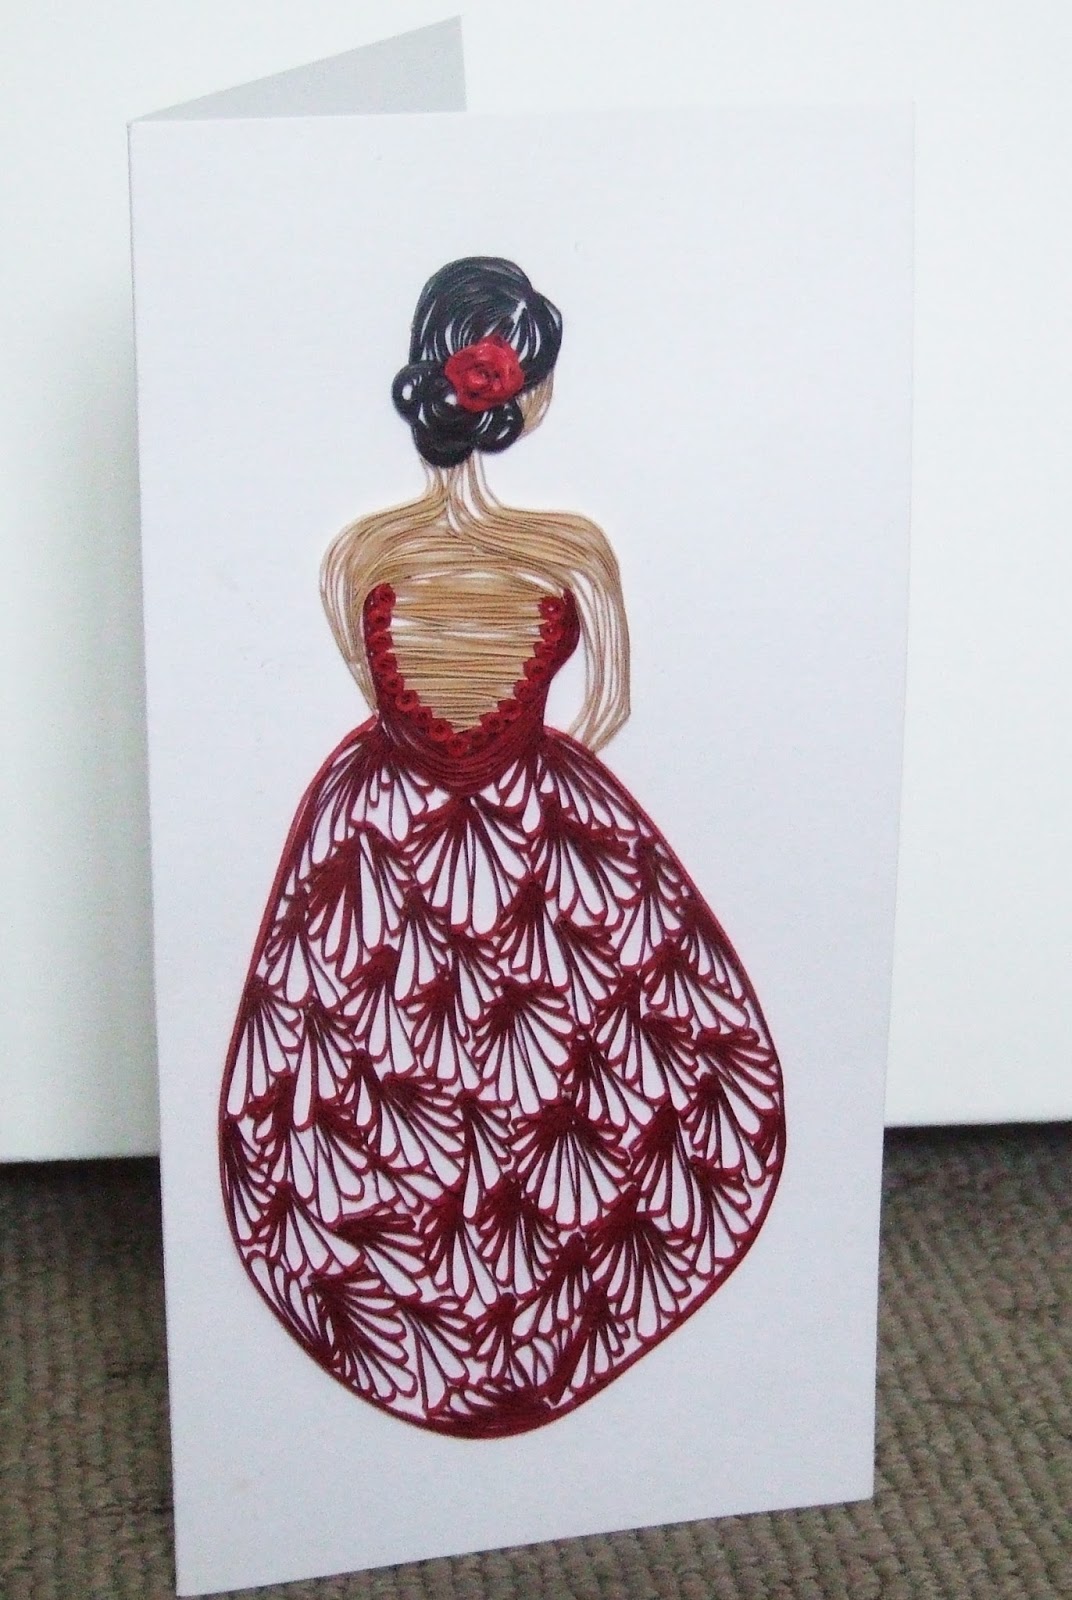
This week I've taken a different approach to roses than my usual 3D quilled roses.


And it's a pleasant vintagey sort of look. I love it.
 
 
The way I made it I ended up with it all solidly attached without being a part of the card yet. It was very cute as a sort of doily on our table.


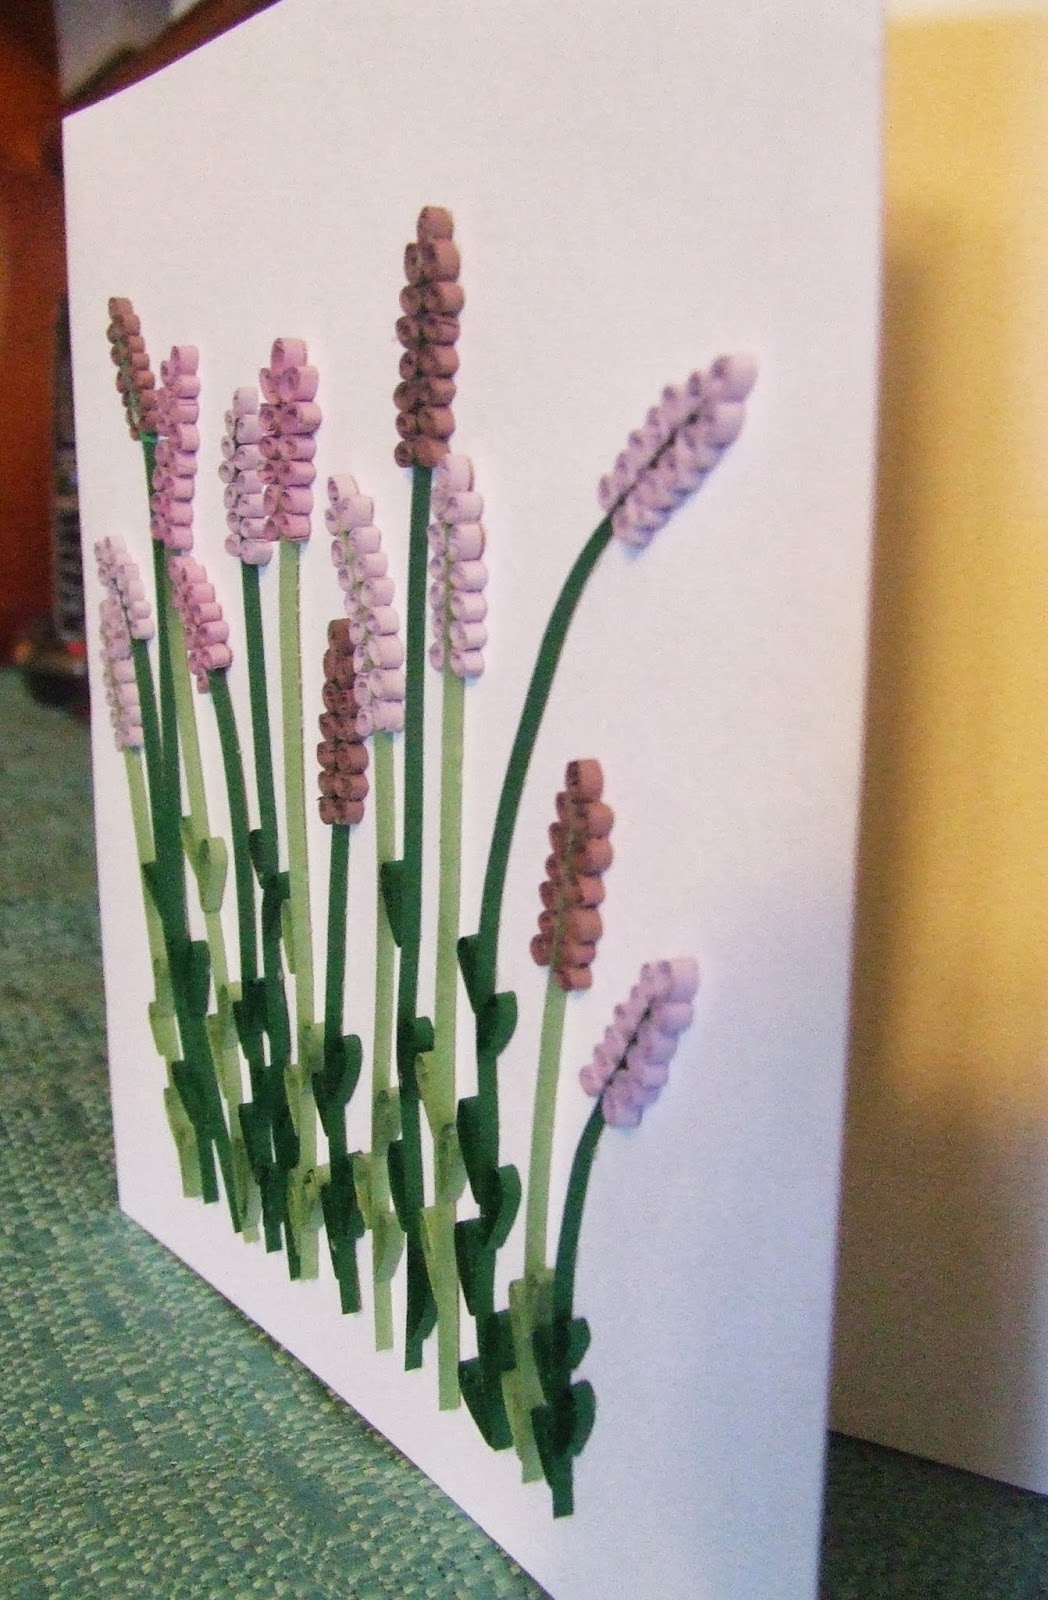
These took a lot of paper and time. I used three shades of pink and two shades of green.


It's wonderfully pink, soft and elegant.


Next week I'm going to get started on Christmas fun early to get a few Christmas themed projects into the end of my quilling challenge. Only three projects left!! I've got far more ideas than that though, it won't be the end, I'll just perhaps not be quite as reliable with my posting. Unless asked nicely.

xnata
 

Monday, September 30, 2013

Week Forty-Five: Lavender

After this week there are only seven projects until the end of my 52 weeks challenge! I can't believe I it, I hadn't noticed that until today. It's gone so quickly, and I certainly have more than seven projects left on my list of ideas, so don't worry, I'll still be quilling and posting after the challenge is complete, just maybe not as often.

This week we've got some lovely lavender cards.


On the bigger one they're growing wild...


...and on the smaller one we've got a bunch of them on a nice metallic purple background.


These are lovely and simple, yet all those little purple dots end up taking a lot of time! I didn't expect they'd be all that time consuming.


They're very softly feminine. I loved the different shades of purple I used in this card, the purple section of my paper supplier's range is one of my favourites (the blue range is the best though - and I seem to be constantly needing more green!)


Next week we've got another 3D quilling project inspired by a furry friend I made a few weeks ago...

Remember that even if I am nearly done with my year of quilling challenge I am happy to hear any suggestions you have of other quilling project ideas you'd like to see me tackle. I am also happy to do some more 'how to' posts with step by step photos by request, I might do a how to on another 3D project I have planned for around Christmas time.

xnata

Sunday, September 22, 2013

Week Forty-Four: Dragon

I'm finally fitting in another request subject this week, and it's one that two people actually suggested. Let's see if I have met people's expectations shall we?


He's red and scary, at least for a dragon that hasn't got his fangs out. And he's got a bit of a belly on him. But you're intimidated, right? Even the cute dragons can breathe fire.


Here he is before he became all colourful. I went with red as it's the colour I immediately imagine when I think of dragons. I suppose he'd look equally lovely in green or blue.


I know he's not in line with my usual style, but I like to be diverse in my creativity and I'm quite pleased with the result. Especially his wings.


Next week we'll go back to my usual super-girliness with a type of flower I haven't quilled before (hard to believe there are many types of flower left, but there you have it! And I won't stop until I've done them all).


xnata.

Tuesday, September 10, 2013

Week Forty-Two: Lady in Red

This week we have a beautiful young lady wearing a long red dress, with a rose in her hair.


I love the rich red I used for the bulk of the dress, and the rose and scalloped edge on her back is a metallic red for a subtle contrast.


I could see making a few more of these in different colours, but sadly I am out of this size in my cards, so I guess I'll just have to go shopping...how sad...


This would be a nice card for a girl's 18th or 21st or something.


 Keeping it short and sweet this week. Next week will be another framed piece, it's a simple design with another inspiring message.


xnata

Wednesday, September 4, 2013

Week Forty-One: Peacock

I'm a week late again, and this time I'm not going to try and catch up. My university courses are demanding a lot of me right now, like too much, and if I try to catch up I will compromise the quality of what I am making, and that wasn't the point of this year long quilling challenge. I wanted to make good quality stuff that would improve my skills and give you all some pretty things to look at and for my buyers to take home, so the one per week thing is the only part I'm willing to modify. I won't be catching up, I'll just add an extra week to the end date each time this happens, which could happen a few more times as one of my teachers seems to think that I can simply quit sleeping if I'm having trouble keeping up.

Anyway, moving on to the project! I have made a peacock card before, a very long time ago and it was a very simplistic design, so with this one I went detailed and as real as my paper supply would allow, and I just love him. He's gorgeous, elegant and dignified.


Isn't he magnificent? I just love when an idea in my head actually comes out right on the page.


Here's a little look at him as he was being made, you'll see I started with the head and worked my way down.


There's a zoo not far from by house in which there used to be peacocks that would frequently escape, there was a number of times that I had to stop as I drove past to wait for ones like this to cross the road...I haven't seen any out in a couple of years, I assume they have worked out how to stop this for the safety of the birds,  wouldn't want one to get hurt!


The colours are so vivid, it's wonderful that nature creates these colours, and wonderful that my quilling paper managed to mimic them too!


He took a long time to make, time I didn't have, but he has been a wonderful creative outlet and I'm sure will catch people's eyes at the next market.


See you for week Forty-Two, whenever that turns out to be!

xnata.

Tuesday, July 2, 2013

Week Thirty-Three: Bridal Gowns

Dum-dum-da-dum, Dum-dum-da-dum...

This week I've made some bridal gown cards for weddings or bridal showers, they're easy to make and can look really special and sweet for the couple or bride-to-be. I sometimes add a rub-on 'congratulations' to them, but this time I've left them word free so the buyers can say whatever they want.

We've got this big swirly wirly pearly gown....


....This feathery fluffy gown with 'something blue'...


...and a slinky mermaid type one with little capped sleeves, for those brides with nice curves that they want to show off...

I've given these to bride friends of mine in the past and they've mentioned that they've kept them as one of their keepsakes. Handmade cards are more special and worthy of being kept whether you're the one who made them or not though. The receiver gets to know they have this one of a kind card amongst their treasures, it's just nicer, okay?

 
The swirly one was done by forming the bodice, then a skeleton of the skirt which I filled in with lots of swirly bits and pieces. It's very big and princessy, and I added some pearl detail to the slim waist line of the gown.


The feathered skirt gown is mimicking those ruffled tulle type gowns, but in a feathery way that I just love. We've got a ribbon around the waist and some scrapbook paper to be the 'something blue', and I love how soft and feminine this one is. This was a bit more free-form than the other two, I just created the love heart bodice and then made lots and lots of the feathery shape and built it up and up until it was at a shape I felt happy with. Delightful.


Then the mermaid dress  was done similarly to the first one, with an outline being created and then filled in with teardrop shaped pieces which are a really easy shape to use for filling a space. It's so slinky and reminds me just a little of my own wedding gown, though mine was unfortunately sleeveless (it was so hard to find any with sleeves, and when I did they were for plus sized brides so I was left with no choice but to have a faux-fur made for my shoulders - you'd think these wedding gown makers would want to encourage winter weddings! Mind you on the day I had no sense of being cold because I was so excited and nervous). It's got a sweet bow at the waist, very romantic.


I'm working on next week's project at the moment, we're getting into this framed piece collection for the next few weeks, and this one is shaping up very nicely. Now please, remember that our give away is still going on on the Facebook page, so head over and comment to win the mask or the framed piece from last week! I'll be drawing that competition a week from today so get your entries in, I've pinned the competition photo to the top of my page.


xnata

Sunday, June 16, 2013

Week Thirty-One: Love

My husband and I have been married for 5 years as of this coming Friday! We've made a pretty good team so far, he's my best friend, and the most awesome little boy, so I would say it's been a very successful 5 years.

Did you know that the traditional gift thing for 5 years is wood? We didn't really need anything made of wood, so we are just going to go on a date one night instead. But my craft involves paper, and paper comes from wood, and this week's project is to celebrate our anniversary, so that counts right?

I saw this design in teeny-tiny calligraphy form in my calligraphy book a while back, and instantly wanted  to quill it, but nice and big.


I got clever for a moment and drew it in the size I wanted, then quilled the shapes using the husking technique (for those not aware of what the husking technique is, check out my week seven butterfly post). For this it was a good way to get the shapes just right for the lettering, though the transfer process was a bit tricky as they all link together and didn't retain their shape so well once I took the pins away.


Careful gluing to the card was required to get them sitting just right, but it turned out just right. I briefly toyed with the idea of adding swirly bits and fill to the letters, but the thought was very brief indeed because I just love the simple look to this, and I think them being swirly bit free keeps the focus on the heart and just really makes the card pop.


This is a fun mod card and I'd happily make more despite the complexity. Now I can't wait to get this giveaway going, I've been working on one of the choices (yes, the winner gets to pick their prize!) and it's so special and exciting I'm going to give you a sneak peek at it on my Facebook page, so keep an eye out for that pickie and then next week we'll get the 100th Blog post celebration and giveaway underway!

If you're in Brisbane Australia remember to come see me at the All Saint's Winter Markets, 501 Hamilton Road Chermside this Saturday (the 22nd) from 7am to 12pm.

xnata

Thursday, May 30, 2013

Week Twenty-Eight: It's Winter!

Remember that Autumn tree I did? It's lost all of it's leaves!

Actually, it got sold at the last markets I went to back in April.

But here's a new one!


I liked the idea of little half pearls being added to make it look like glistening drops of snow, and I'm really happy with the effect, I think I'll make one of these again.


As I'm writing this I'm shivering despite being in long pants and a jumper. And I live no where near snow. And it's not even technically winter for two days. So I should probably be grateful that this little tree is the closest I'll be to snow this winter.


Some of the pearl beads are reinforced with a little bit of white quilling paper to keep them in place, because the little branches were a bit precarious for them to sit on.


I'm working on next week's project at the moment, it's something I've been dreaming up for a while and I'm really happy with how it's going so far. It's a framed piece, and pretty different from everything else I've done so far, but I think you'll like it. As I work on it I'm getting more ideas for other pieces like it...maybe it'll become a series!

See you next week snow bunnies,

xnata 

Monday, May 20, 2013

Week Twenty-Seven: Two!

This week my son will be turning two years old, so this week's project was to make two two cards!


One is blue and green and probably suited to a boy, but I didn't want to show a bias and ignore all the beautiful two year old girls out there, so the second is pink and purple.


To make these numbers I printed off a flipped number two, and used the husking technique again, but with some modifications. I used dress pins instead of berry pins, so that the heads of the pins wouldn't get in the way...


I loved the simple design of this balloon card. I once the balloons where in place I decided to just add a layer of crimped blue paper inside the two, and then it just looked perfect to me.


 I love it. It just makes me smile.

 
I almost made the girl's one the same design as the boy's one, but I wanted a bit more variety so I went full on girly with it.

 
Ruffles and polka dots...

Pink crimped rainbow, a flower and a love heart. Could it be girlier? I don't think so. I love the bright colours of both.

Next week we're moving reluctantly on from the theme that is my wonderful boy and all things baby, and celebrate the changing of seasons!

xnata

Tuesday, May 14, 2013

Week Twenty-Six: Baby Fever!

We're half way through my year long challenge! Holy wow that's gone fast!


This month I've caught baby fever, because I'm the mother of an almost two year old and it's making me terribly nostalgic and clucky. I can't believe I'll never get to cuddle the baby version of my boy again! On a positive note, he is a fantastic kid, fairly obedient as far as toddlers go, clever, cheeky and hilarious.


I'm not alone in my baby fever though, I have several pregnant friends, and friends with babies, and my baby cards are always bought on their first trip to a market, so I guess the fever is everywhere!


I wanted to make some baby boy and baby girl typography cards, and then that led to me making a bunch of baby themed gift tag cards too!


I added a bow, a flower and a love heart to the super pink it's a girl card...


I really like the addition of the bow to the I.


And a hat, a cricket bat and bouncing ball to the lovely blue it's a boy card.


The hat on the O has the same magic as the girl's bow.


For the little gift tag cards I added squares of scrapbooking paper in the classic colours, then added the words, punched a hole, added the string, and quilled some little tiny feet...


These would be nice to add to a bag of goodies to give to a new mummy when you get your first cuddles, or at a baby shower. I like small cards like this for my own gift giving purposes, because it keeps your message inside short and sweet. Big cards make me feel obligated to write a big long message, which probably leads to rambling.

I want to make sure I have heaps of baby cards available for my next market, because they're such good sellers and I hate to disappoint my customers when I run out. This lot has me off to a good start!


The text I've used on these are rub-on stickers, and I love them, they are perfect for the look I want for my cards, and I've just discovered today that the 'it's a boy' and it's a girl' of these have been discontinued :( so I hunted around online and found some at one shop and bought five packs of each in two different colours, so I've got 100 of each which arrived in the post today, and for only 30 cents per packet  :) hopefully by the time I run out I'll have found a new design that I like.


Next week baby fever continues, with more of a focus on my soon to be two year old.

xnata.